Requirements
- WordPress 6.4 or newer and WooCommerce 6.0 or newer (HPOS and the classic order storage both work).
- PHP 7.4 or newer.
- A modern browser on the device you sell from: Safari on iPad or iPhone, Chrome on Android or a computer, or Edge. There is no app to install.
- Your site served over HTTPS (needed for offline mode and the camera).
- A card terminal of your own if you take cards (Square, Clover, SumUp, Zettle or any other). Luminos POS records card payments; it does not charge cards itself.
Install and set up
- In WordPress, go to Plugins → Add New → Upload Plugin, choose the
luminos-pos.zipfrom your purchase email and activate it. - The setup wizard opens. It asks for your store name, your first location, the payment types you take, and a first cashier login. You can skip it; a Finish setting up notice links back to it until setup is done.
- Enter your licence key under Point of Sale → Luminos POS. The key turns on automatic updates; the register works with or without it.
- Fine-tune everything later under Point of Sale → Settings.
Open the register
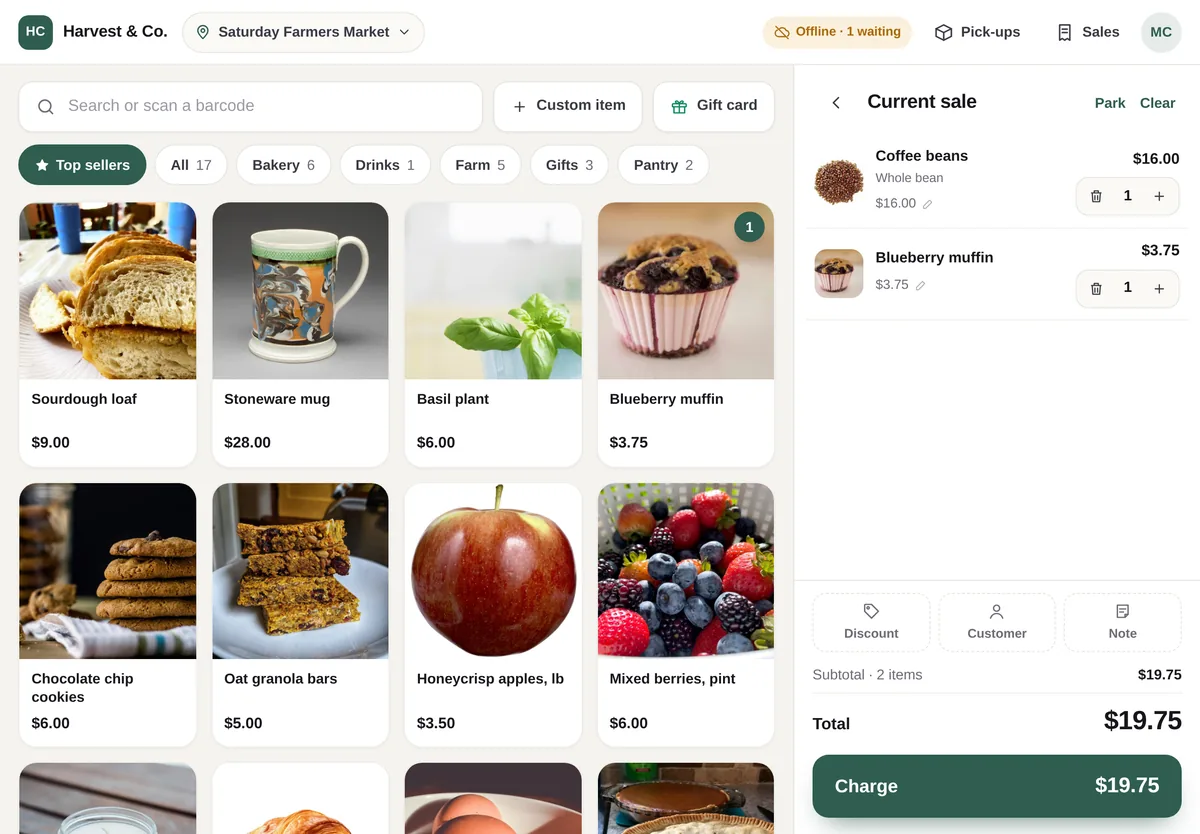
The register lives at Point of Sale in your WordPress menu and opens full screen. On a tablet or phone:
- Log in to WordPress on the device and open Point of Sale.
- Add it to the home screen (Safari: Share → Add to Home Screen; Chrome: menu → Add to home screen). It then opens like an app.
- Choose the location you are selling at, and give the register a name (for example "Register 1") so reports can tell your registers apart.
Open the register once with a connection before you need it offline: that first visit saves the register and your products on the device.
Staff, PINs and approvals
Cashier logins
Give each person a WordPress user with the POS Cashier role (Users → Add New, or the wizard). A cashier login opens the register and nothing else in WordPress. Owners, admins and shop managers can use the register with their normal login.
PINs on a shared tablet
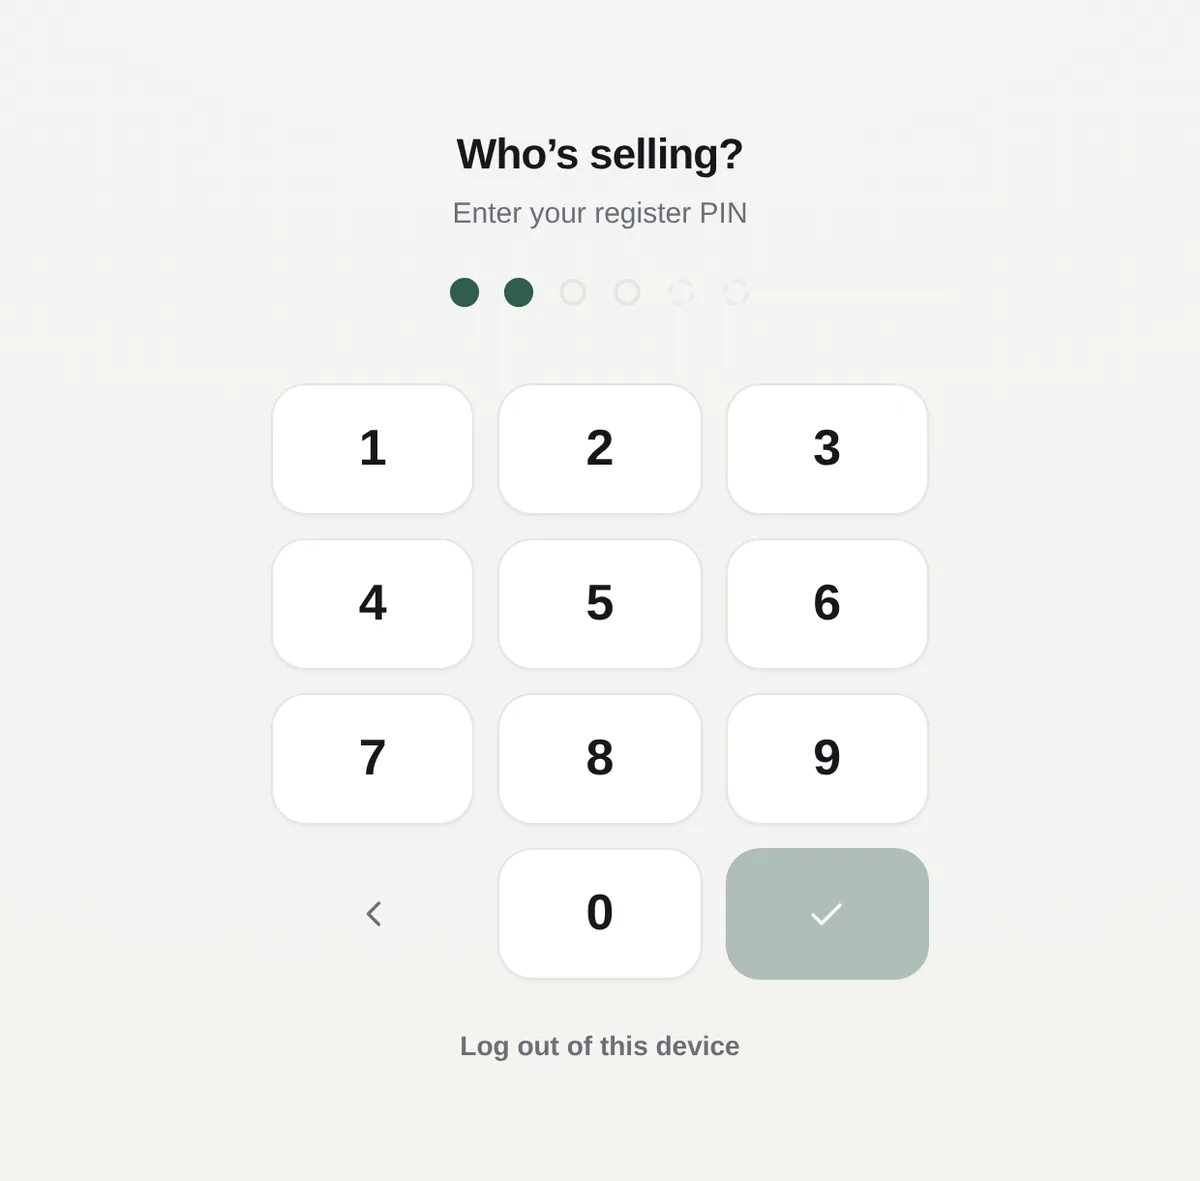
Turn on Ask for a PIN to use the register under Settings → Staff and approvals. Staff then switch with a 4 to 6 digit PIN instead of logging out, and every sale records who rang it up. Set an auto-lock time to lock the register after that many idle minutes.
Only managers set PINs: open Users, edit the person, and fill in Register PIN. Each PIN is unique, so a PIN alone identifies its owner. After 10 wrong PINs in 10 minutes the device waits before accepting more.
Manager approval
Choose which actions need a manager’s PIN: voids and refunds, price changes, comps (giving an item away) and discounts above a percentage you set. The register asks for the PIN at the moment it’s needed. The same rules are checked again when the sale reaches your site; a sale that arrives without a required approval is still saved, and marked ⚠ Needs review in the orders list.
Taking payment
- Card: run the total on your terminal, then tap Payment approved. Rename the button to match your terminal under Settings → Payments (for example "Card (Square)").
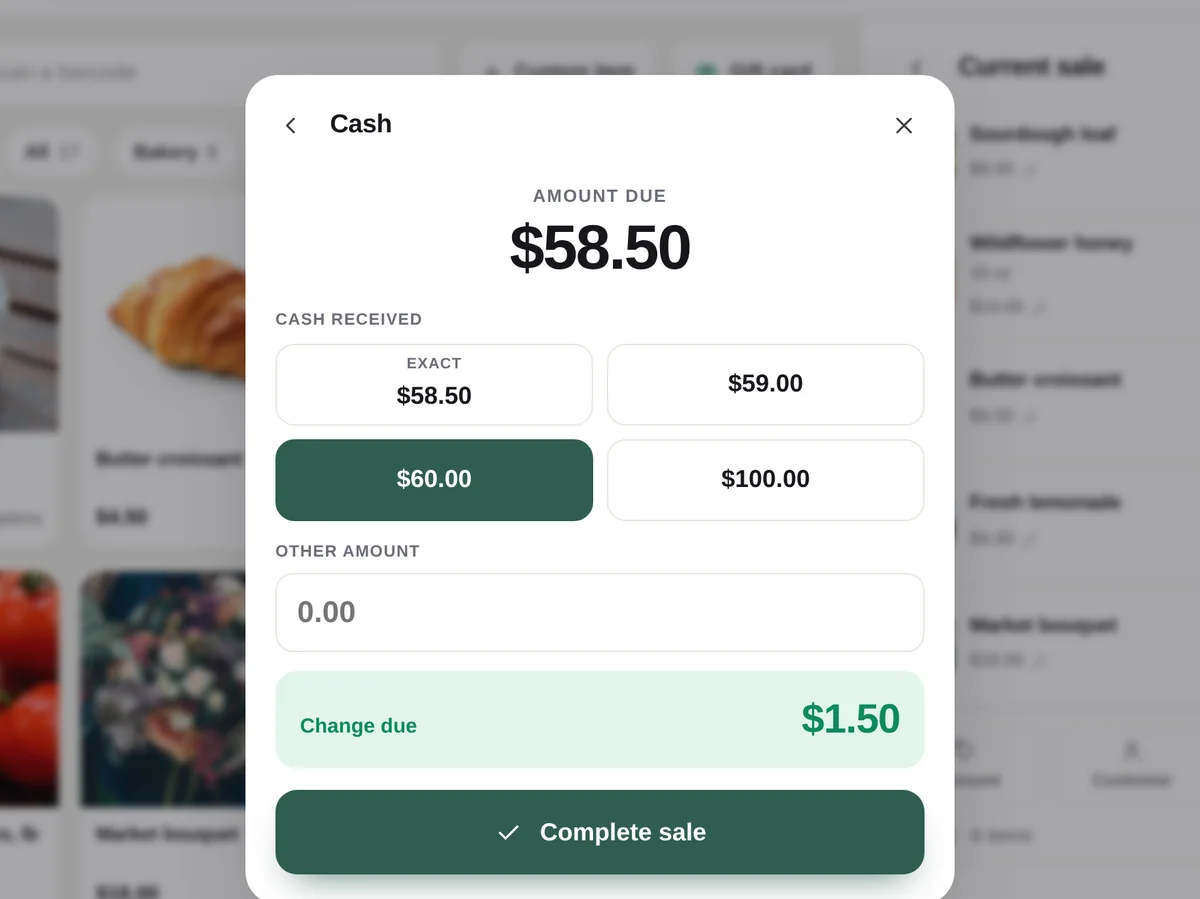
- Cash: tap a quick amount or type what you were handed; the change is worked out for you. Quick amounts are set in Settings.
- Other: one extra payment type with your own label, such as Venmo or a cheque.
- Gift card or store credit: enter the code; if the card doesn’t cover the total, take the rest by card or cash.
- Tips: turn on tips in Settings to offer preset percentages before payment, on the register or the customer display.
- Coupons: your WooCommerce coupon codes work at the register. A manual discount and a coupon can’t be combined on one sale.
Selling offline
When the connection drops, keep selling. Each sale is saved on the device first, then sent to your site as soon as the connection is back, in order and never twice. The top bar shows Offline and how many sales are waiting. A sale that is offline when it happens is dated when it happened, not when it synced.
What needs a connection: checking a gift card balance, loading online pick-up orders, and the very first time the register is opened on a device. Keep the register open until waiting sales have synced before you clear the browser or log out.
Locations, tax and stock
Add each market, event or shop as a location under Settings → Locations, with its address. Every sale records its location, and reports and close-outs break down by location.
Tax: when WooCommerce calculates tax from the customer’s address (WooCommerce → Settings → Tax → Calculate tax based on set to shipping or billing address), register sales are taxed at the location’s address. When it’s set to your shop base address, every sale uses your base address.
Stock per location: turn on Track stock per location to load out what you bring to each location and count it. Every tile then shows what’s left there, with low-stock warnings. Separately, Register sales reduce online stock decides whether register sales count against your WooCommerce stock.
Online pick-ups
Orders placed on your website with a local pick-up shipping method (WooCommerce Local pickup) and paid show up under Pick-ups at the matching location. A pick-up order matches a location when its pick-up details contain the location’s name, or the text you enter in the location’s Pick-up orders match field. Tap Mark collected as customers arrive and the order is completed. Unpaid orders can’t be handed over.
Gift cards and store credit
- At the register: tap Gift card, enter an amount, and charge it like any sale. The code is shown and printed on the receipt.
- Online: use Create a gift card product in Settings (or tick Luminos gift card on a product). Shoppers choose an amount and a recipient, and the code is emailed when the order is paid. Shoppers redeem it in the cart or at checkout.
- Balance checker: add the
[luminos_giftcard_balance]shortcode to any page. - Store credit: a return can be refunded as store credit, which is issued as a gift card.
- Gift card codes are shown in full to staff only right after the sale; after that they are masked (managers always see them). Voiding or returning a gift card sale cancels the card. A card that has already been used can’t be refunded.
Returns and voids
Open Sales on the register to see today’s sales. Void refunds a whole sale; Return refunds some items, puts them back in stock if you choose, and refunds to the original payment or as store credit. Both may need a manager’s PIN, depending on your settings. Refunds are recorded in WooCommerce; money for card payments goes back through your terminal.
Closing out the day
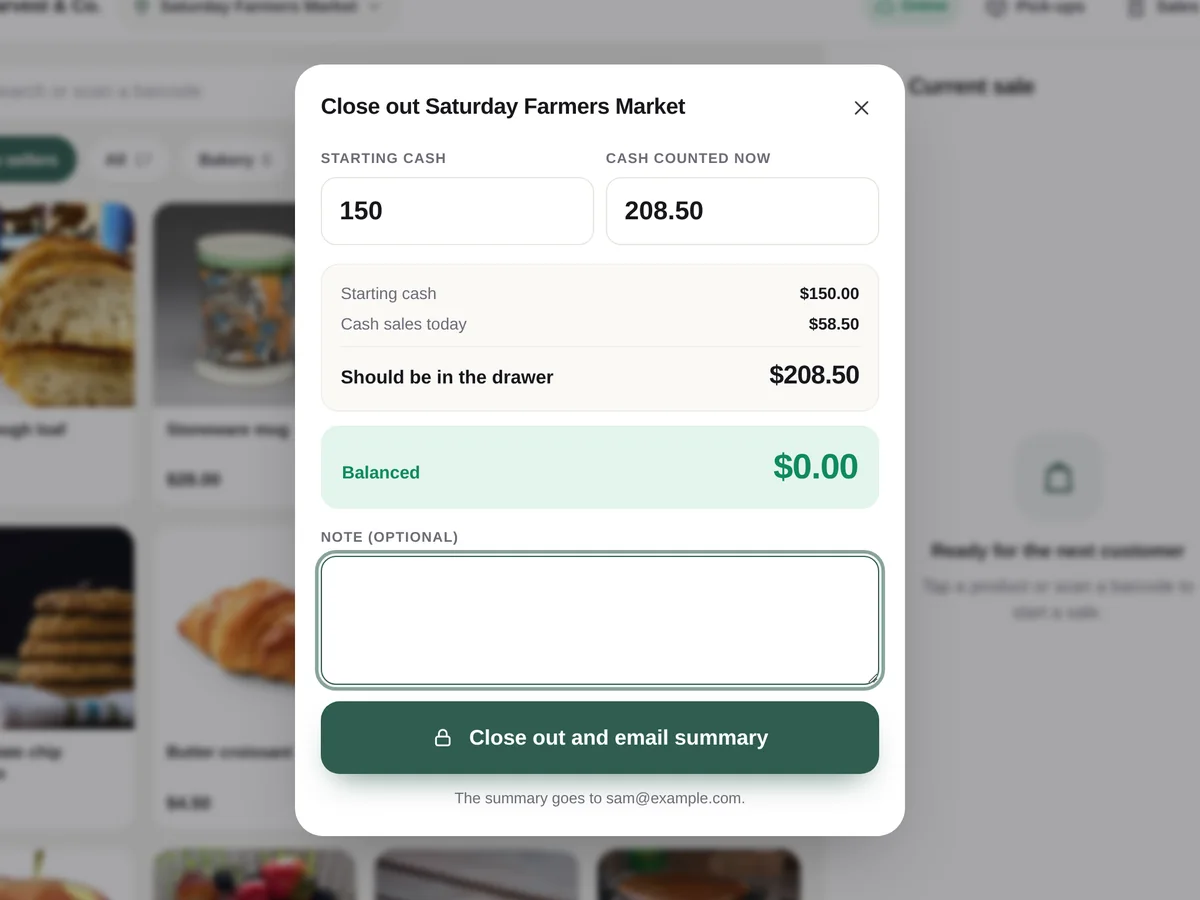
On the register, open Sales → Close out the day. Enter the cash you started with and what is in the drawer now; the register shows what should be there and whether you are over or short. When several registers sold at one location, each register counts its own drawer. The summary (sales by payment type, discounts, comps, voids, best sellers and low stock) is emailed to the address in Settings and kept under Point of Sale → Close-outs.
Reports and exports
Point of Sale → Reports shows sales by location, cashier, register, payment type, day and hour, top products, and in-person against online, for any date range. Export sales or totals by product as CSV. Newsletter sign-ups collected at the register download from Settings.

Barcodes and labels
Scanners: any USB or Bluetooth barcode scanner that types into the browser works without setup: scan into the search box or anywhere on the register. Products match on their SKU or GTIN/EAN.
Camera: tap the scan button to use a phone or tablet camera. The browser asks for permission the first time. If it never asks, your web host may be blocking the camera with a Permissions-Policy: camera=() header; ask them to change it to camera=(self).
Labels: Point of Sale → Barcode labels prints Avery sheets or thermal-roll labels, and gives products without a barcode an SKU in one click.
Receipts and printers
Customers can get a receipt by email, by text message (with your own Twilio account, set up in Settings) or printed. Choose a printer from the register menu under Receipt printer:
- Any printer: uses the device’s own printing (AirPrint on iPad, the system print dialog elsewhere).
- Epson TM or Star network receipt printers (beta): the tablet must be on the same Wi-Fi as the printer. Enter the printer’s IP address, then open
https://<printer IP>once in the same browser and accept its certificate. These printers can also open a connected cash drawer.
Customer display
Turn a second tablet or screen toward the customer to show the order as you ring it up and let them choose a tip. On the register, open the menu → Customer display, switch it on, and open the link (or scan the code) on the second device. The display needs a WordPress login too; a cashier login is fine.
Troubleshooting
- The camera doesn’t start.
- Allow the camera for your site in the browser settings. If you are never asked, see the Permissions-Policy note under Barcodes.
- “Too many wrong PINs.”
- After 10 wrong PINs in 10 minutes the device waits. Wait ten minutes, or sign in with a WordPress login that doesn’t need a PIN.
- A sale says it needs attention.
- Your site refused it (for example a product was deleted). It stays on the device and isn’t lost; open Sales to retry or see why.
- An order is marked “Needs review”.
- It arrived without an approval your settings require. The order note says what was missing.
- “This device’s storage is full.”
- Keep the register open until waiting sales have synced. The saved product list is cleared first to make room, and downloads again when you are online.
- Products or prices look out of date.
- Use Refresh products in the register menu.
For developers
luminos_pos_newsletter_signup(action):$email, $first, $last, $orderwhen a customer joins the newsletter at the register. Hook it to send them to your email platform.luminos_pos_remote_catalog_threshold(filter, default 1500): above this many products the register searches on the server instead of copying the catalog to the device.luminos_pos_sms_allowed(filter):$allowed, $to; by default text receipts only go to numbers in your store’s country.luminos_pos_mask_customer_contact(filter, default true): mask emails and phone numbers in register customer search.- Register sales are WooCommerce orders with
created_via = luminos-posand meta such as_lpos_location,_lpos_register,_lpos_cashierand_lpos_tender.
Still stuck?
Write to support@luminosagency.com or use the contact form. Licence holders get support for as long as their licence is active.